
It’s probably safe to say that when we entertain in our home, the bathroom likely doesn’t get much attention. Have clean towels, make sure it’s stocked up and you’re good
I have been inspired and motivated to transform things this year and my giant leap into redoing a desk that I no longer used was one of my more ambitious endeavours.
I’m an event planner, stylist and consultant and while I also do decor work, I am more of the have-an-idea-buy-what-you-need kind of gal.
I really, really like the idea of repurposing something and I feel more empowered than ever to DIY an item into something new. Well, after a few weeks, a couple of setbacks, and some fun results, my biggest DIY challenge is complete.
To recap for you, I decided that I wanted to overhaul a desk that I had previously used in my home office space. Since my re-do of that room, the big, clunky desk found it’s fate sitting in my basement. It was a great desk, but it was too dark and heavy for my needs now.
Here it is in my “old” office space.
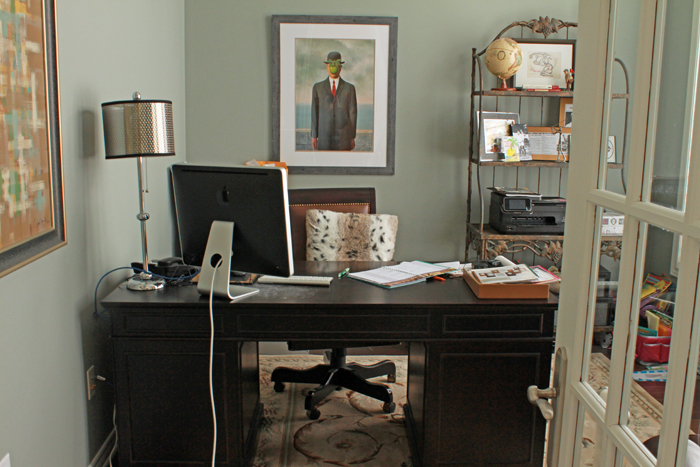
Whatever should I do with it?
Then I found a great studio space and my desk found a new home. But it needed a little shake up first. So, I started right away.
It got three coats of primer.
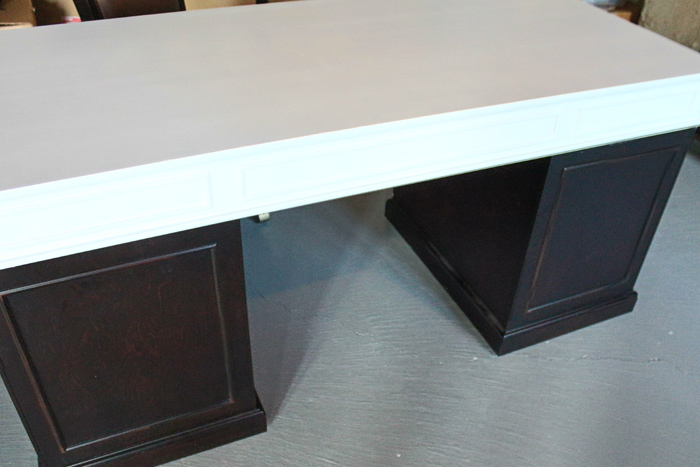
Then a few coats of blue paint.
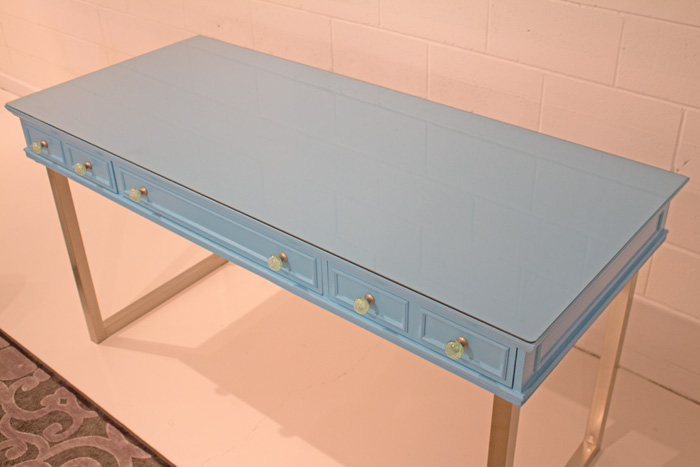
And the results are in.
It’s lighter and brighter, and apparently a little taller.

Here’s the low-down on what I did and why.
To make the desk lighter and more useable, I changed it from a partner’s desk design to more of a parsons desk. I opted not to used the old legs with drawers in them and used simple metal legs (a great Ikea find). Now, the desk can be pushed against the wall or float anywhere in the room. It can be used on both sides and two of us can work on it at the same time.
To brighten it up I chose a bold blue. I like using variations of blue in my work space and this shade can’t help but stand out. But, I will say that if doing it again, I may have used more of a matte finish with the paint. While I wanted more of a sheen to it, the glossy finish was tricky to work with on the top and I couldn’t get smooth lines no matter how many coats. This is likely a combination of the paint and my minimal skills but with a glass top, that imperfection is hard to find.
And the desk is a little taller than before. This actually wasn’t intentional, but I’m glad for this mistake. I didn’t actually measure the metal legs for the correct height. I liked them, they were a good price, I bought. Also contributing to the height was the added layer of plywood on the bottom of the desk. When the drawers were removed, there were open spaces underneath the desk that I hadn’t accounted for. In order to install other types of legs, a plywood layer was needed to drill the legs into. A thin layer of wood + longer legs=a taller desk.
This works great for me though. I can work standing up or get some fantastic stools to sit if needed. It also elevates things when placed in a room with high ceilings. So, all in all it works.
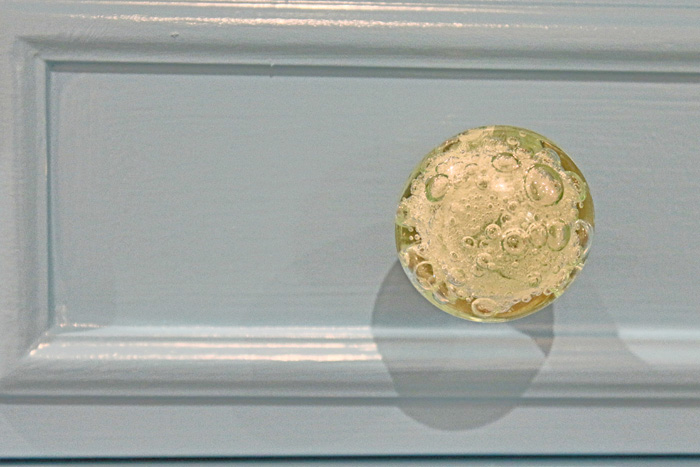
Change out the knobs to something a little more fun and whimsical and voila, my first real do-it-yourself project complete.

What do you think of the results? Does it inspire you to try your hand at something too?
This was an ambitious project and not as simple as I first had thought. But, it was worth sticking it out and I’m totally pleased with the results.
I have caught the bug a bit. Now I find myself scouring the forgotten things in my home or critiquing various items for needed change. I wonder what will be my next project.
If you want to start from the beginning, check out the start here, and the progress here.


the choice of knobs on the desk enhance the uniqueness of the re-do>
Thanks so much. The knobs add a touch of softness to the desk. Knobs are an inexpensive way to really change the look of furniture. Thanks so much for your comment.
This is fantastic! I’m inspired. I just picked up a small chest of drawers labeled ‘free’ from one of my neighbours. It has great Bones and is solid wood; but it’s darker wood, a little scuffed and the knobs are loose. I want to revive it now. How did you prep for painting?
Thanks so much. It’s so fun to find something that has solid bones to work with and create something new. For the desk, I used about three coats of white primer before putting my paint on. For you’re chest, if the scuffs are noticeable, you may have to sand it a bit, but sometimes those imperfections are what bring character to a piece. Just prime it a few coats to cover the dark colour and go for it. Have fun and good luck.